How to Create a Restore Point in Windows 7
Are you searching for the tutorial on “How to Create a Restore Point in Windows 7?” then stay at the article for a complete tutorial.
in our previous articles, we have taught you about How To Restart Windows’ Explorer.Exe Using Taskbar And Start Menu, How to Convert A Bootable Pen Drive To A Normal One and Best Computer Tips and Tricks to Impress Your Friends
But today we are going to discuss How to Create a Restore Point in Windows 7.
Let’s proceed our discussion
Most of the apps in Windows automatically create a restore point to be stored and if you are feeling worries about an app (that what it will do with the system after installation) before installing it, you need to create a restore point for Windows System.
Try these also:
How to Add Control Panel Shortcut to Windows 10 Right Click Menu
How to Take Screenshot of Complete Webpage With One Click
How To Make Adobe PDF And Sumatra PDF Readers To Restore Last Opened Files
How To Access The Most Recently Opened Documents In MS Word 2016
Here is how you can make it happened:
- Go to the Start menu
- Right-click on the Computer
- Select it Properties

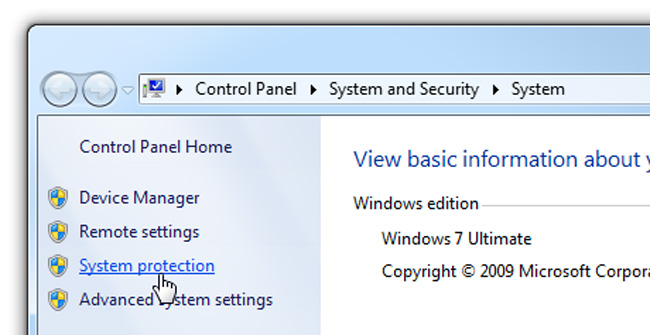
- Control Panel window will appear in front of you
- Click on the System Protection appeared in the left-side of the window

- A System Properties window will appear in front of you

- Select System Protection tab which shows up System Restore section.
- Now, click on the Create button which creates a new restore point
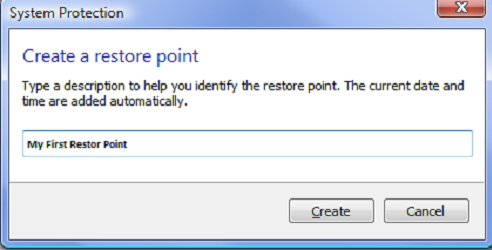
- The new restore point will be prompted for a name, you can use a general name that you can identify later at the time of need

- Click on the Create button
- Now restore point is created by the system

- At the end, a message will appear that “The restore point was created successfully”

Congratulations!
You have successfully created a restore point in windows 7.
We have talked about how to create a restore point in windows 7 so far if you have any questions in your mind kindly ask through the comment section.
