Install Mac OS Sierra in Virtual Box on Windows 10
The latest version of Mac system software is macOS Sierra 10.12 final which comes with lots of useful features. Apple is adding unbelievable features to its OS day by day and today we will (above said version 10.12 final) install Mac OS Sierra in Virtual Box in windows 10
For example, Siri is one of the amazing features of macOS Sierra which is designed to make the mac desktop more attractive and smart one.
There are too many software available in the market for virtualization and but the famous softwares are VMWare and Virtual Box. Today, we are talking about to Install Mac OS Sierra in Virtual Box in Windows 10, 8.1, 8, 7 and XP too. This macOS can be installed via VirtualBox as an application on your PC.
Also, try these suggestions by The Fanman Show:
- How to Make Video Calls And Group Video Calls On WhatsApp?
- How to Stop Facebook Automatically Playing Videos On IOS And Android?
- How to Restore Your iPhone, iPad, | How to Reset Forgotten Passcode on iOS Devices?
We can also “install Mac OS Sierra on VMware” but we will discuss that later in another article.
So, let’s start from root level to “install Max OS Sierra in Virtual Box”
PC Specifications to Install Mac OS Sierra in Virtual Box:
If you are thinking to install macOS on your PC then must be sure that your PC has the following specifications at least
- 4GB RAM
- Dual core processor
- 64-bit System
When you try to combine two operating systems on a single PC, it looks difficult anyways but not impossible at all. Through Virtual Box you can run another operating system on the same machine.
The operating system which runs through the Virtual Box will work as an application. The major benefit of combining two operating systems is to get advantages the best of both the operating systems.
Download macOS High Sierra 10.13.1 ISO – Direct Link
Here are the download links for macOS High Sierra 10.13.1 ISO Installer officially downloaded from Apple Store then converted macOS High Sierra 10.13.1.DMG to macOS High Sierra 10.13.1.ISO. It is for educational purposes only. Please consider this before downloading macOS High Sierra ISO.
macOS_High_Sierra_10_13_1_Official.part1-5 Download: Google Drive Folder
If the above links are not working for mac os VirtualBox image download, then you have to create mac os high sierra VirtualBox image with a slight effort below.
Step # 1: Creating a macOS Sierra ISO file
First of all, we need to create an ISO file of macOS Sierra’s Installer. This ISO file must be loaded to the Virtual box of the PC.
- Go to the Mac App Store and Search for Sierra
- Click on Download
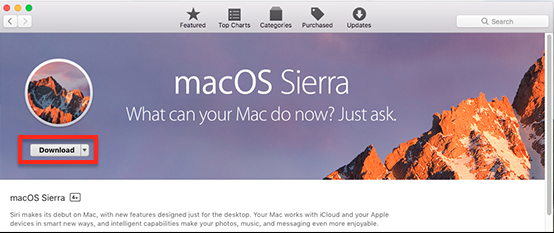
- After completing the process of downloading, the installer will install it in PC
- Do not upgrade the Mac just you need the downloaded files
- Go to Application > Utilities to get Terminal which can be used to convert the files into ISO files
- Paste the following command in Terminal and tap on Enter
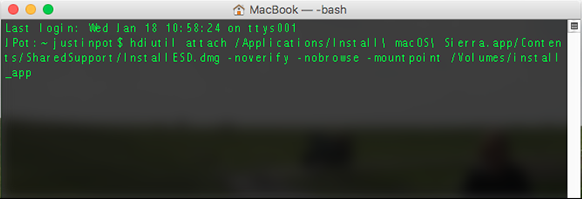
hdiutil attach /Applications/Install\ macOS\ Sierra.app/Contents/SharedSupport/InstallESD.dmg -noverify -nobrowse -mountpoint /Volumes/install_app
- This will increase the bootable section of the installer which are downloaded as a virtual disk
- To create the blank disk image, run the following command
hdiutil create -o /tmp/Sierra.cdr -size 7316m -layout SPUD -fs HFS+J
- Mount your blank image with the help of the following command
hdiutil attach /tmp/Sierra.cdr.dmg -noverify -nobrowse -mountpoint /Volumes/install_build
- Now move to restore BaseSystem.dmg from the mounted installer over to a mounted image
asr restore -source /Volumes/install_app/BaseSystem.dmg -target /Volumes/install_build -noprompt -noverify -erase
- When you erase some unnecessary files from newly restored derive, you will see the name of your destination mount point which will be “OS\ X\ Base\ System/System,”
rm /Volumes/OS\ X\ Base\ System/System/Installation/Packages
- You have to copy some more files that are needed
- cp -rp /Volumes/install_app/Packages /Volumes/OS\ X\ Base\ System/System/Installation/ cp -rp
- /Volumes/install_app/BaseSystem.chunklist /Volumes/OS\ X\ Base\ System/BaseSystem.chunklist3. cp -rp
- /Volumes/install_app/BaseSystem.dmg /Volumes/OS\ X\ Base\ System/BaseSystem.dmg
- Now, Unmount the two images with following commands
- hdiutil detach /Volumes/install_app
- hdiutil detach /Volumes/OS\ X\ Base\ System
- Here, convert the image into ISO file
hdiutil convert /tmp/Sierra.cdr.dmg -format UDTO -o /tmp/Sierra.iso
- Move this ISO to the desktop
mv /tmp/Sierra.iso.cdr ~/Desktop/Sierra.iso
- Finally, we have got bootable Sierra ISO file
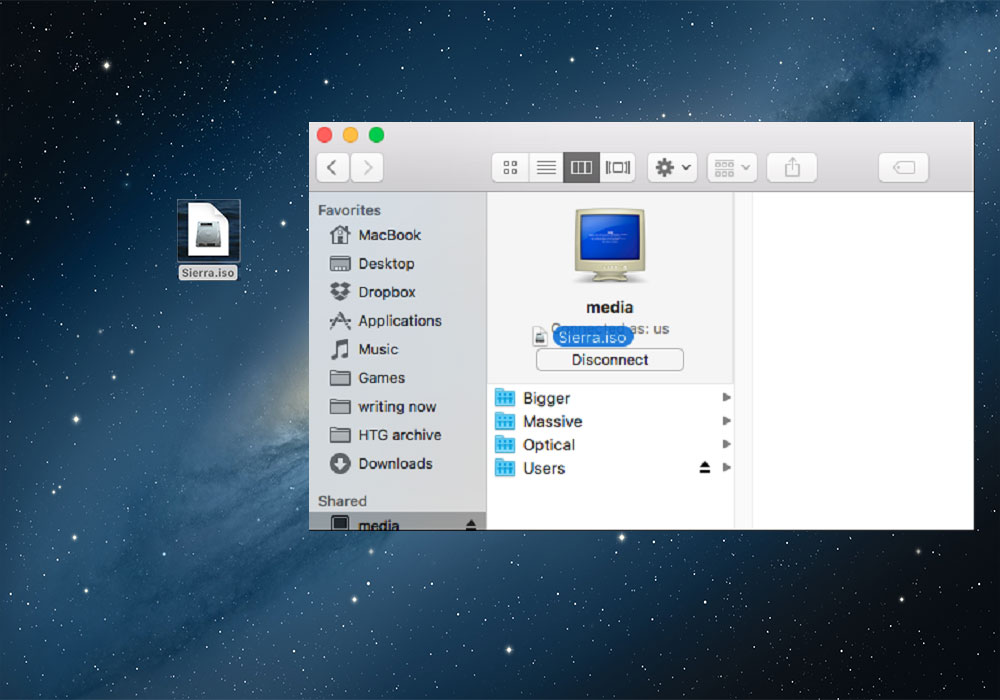
- Copy this sierra ISO file to the Window machine
Step # 2: Creating Virtual Machine in Virtual Box
you’ll require creating a virtual machine in a virtual box in order to Install Mac OS Sierra in Virtual Box.
follow the steps below:
- Open your Windows machine and install the latest version of Virtual Box
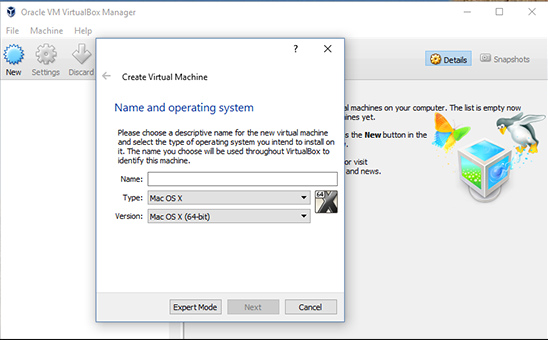
- Open the Virtual Box and click on New This will ask you the new name of the Virtual machine. Put the name “macOS Sierra”
- Select “Mac OS X” for the operating system and “Mac OS X(64-bit)”
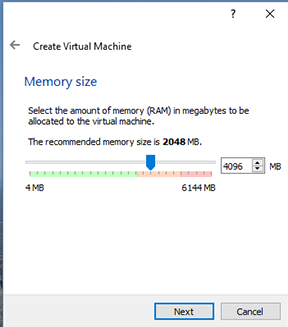
- The recommended memory size must be 4096MB so that you can work more if the RAM is enough
- Now, it will ask about the hard derive which you have to select “Create a Virtual Hard Disk Now” and tap on Create
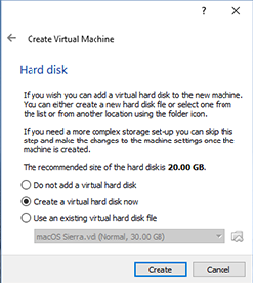
- The type of the hard disk must be VDI and click on Two options will be in front of you about the size of the drive:
- Dynamically allocated
- Fixed size
I recommend you “Fixed size” because it is faster but it takes more space
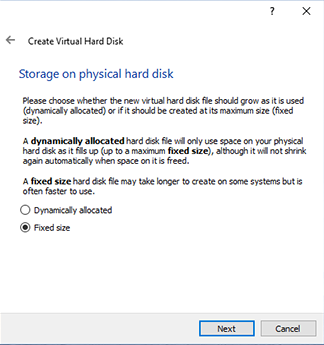
- After the click on Next button, you’ll be asked for drive capacity which I recommend you to choose 25GB because it is enough for OS. You can select more than this capacity but less than this is not recommended
- Click through the prompts that mean you have created an entry for virtual machine
Step # 3: Configuring Virtual Machine in VirtualBox
To install Mac OS Sierra in Virtual Box, we need to configure a virtual machine in Virtual Box.
To do so follow the steps below:
- It time to configure out the virtual machine. You can see a virtual machine in the main window of the Virtual Box
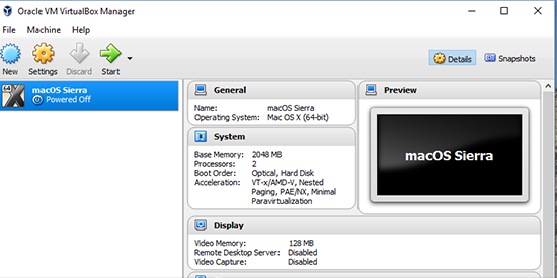
- Select your virtual machine which you name “macOS Sierra” and tap on the Settings button
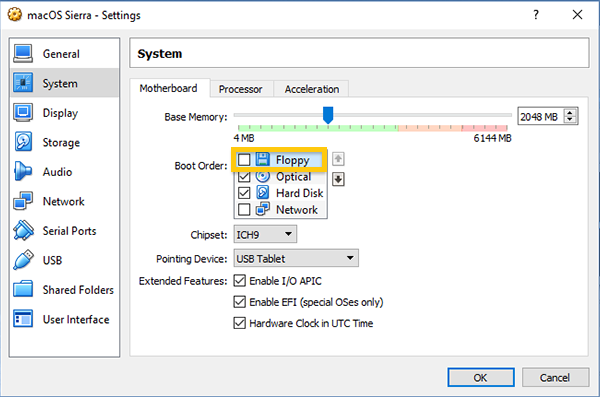
- Go to the System situated at the left sidebar
- On the motherboard tab, be sure that “Floppy” is unchecked
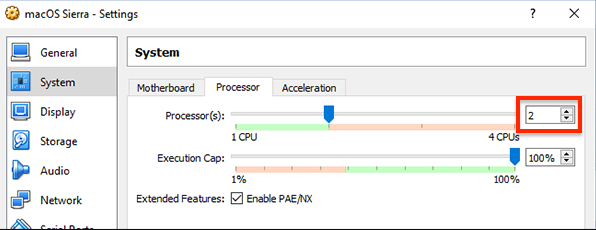
- In the System, tab go to the Processor where you have to make sure that two CPUs are allocated to the virtual machine
- Now, go to the Display option situated at the left sidebar of the Settings window
- Here, you have to be sure that video memory is set to 128MB
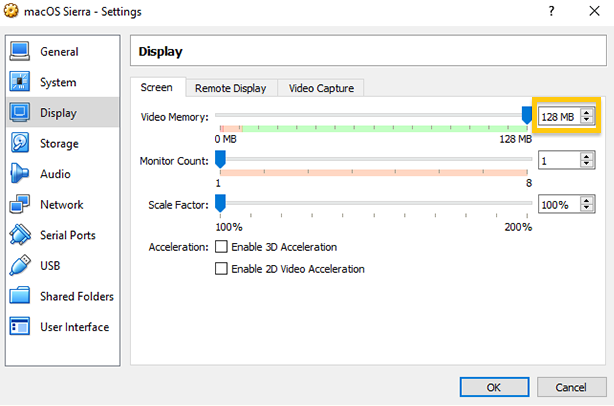
- Now, go to the Storage option which is situated at the left sidebar
- Click at the Empty CD drive
- Tap on CD icon which is presented at the top right and browse the ISO file you created earlier
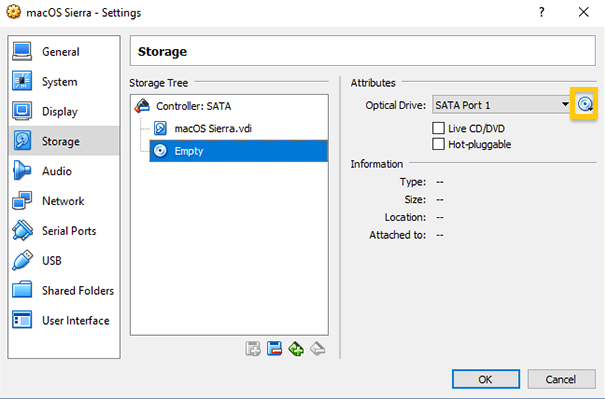
- When you done with all the options click on OK to save the changes you have made
Step # 4: Configuring Virtual Machine from the Command Prompt
To Install Mac OS Sierra in Virtual Box, we did some adjustments with some options but still, we need some more adjustments to convince the OS that it is running on a real Mac. Unfortunately, Virtual Box not provides these options. So, we have to work in the Command Prompt.
So follow the steps below to further process to install Mac OS Sierra in Virtual Box
- Open the Command Prompt
- You have to paste the following commands one by one and press Enter after pasting every single command
1. cd “C:\Program Files\Oracle\VirtualBox\”
2. VBoxManage.exe modifyvm “macOS Sierra” –cpuidset 00000001 000306a9 04100800 7fbae3ff bfebfbff
3. VBoxManage setextradata “macOS Sierra” “VBoxInternal/Devices/efi/0/Config/DmiSystemProduct” “MacBookPro11,3”
4. VBoxManage setextradata “macOS Sierra” “VBoxInternal/Devices/efi/0/Config/DmiSystemVersion” “1.0”
5. VBoxManage setextradata “macOS Sierra” “VBoxInternal/Devices/efi/0/Config/DmiBoardProduct” “Mac-2BD1B31983FE1663”
6. VBoxManage setextradata “macOS Sierra” “VBoxInternal/Devices/smc/0/Config/DeviceKey” “ourhardworkbythesewordsguardedpleasedontsteal(c)AppleComputerInc”
7. VBoxManage setextradata “macOS Sierra” “VBoxInternal/Devices/smc/0/Config/GetKeyFromRealSMC” 1
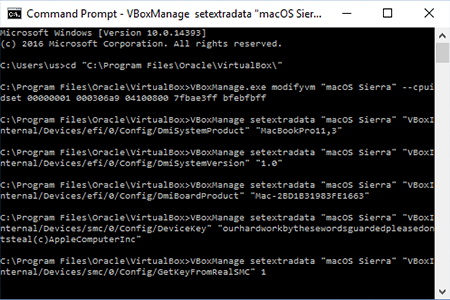
- After doing all this, when you find everything working fine, close the Command Prompt because now, we have to go back to the VirtualBox for more actions
Step # 5: Process to Install Mac OS Sierra in Virtual Box
Installing macOS Sierra in Virtual Machine will require the following steps:
- Again open VirtualBox
- Select macOS Sierra and click on Start
- Booting will be started on your machine. Here, you can see the superfluous information for which you have not to worry because it is still normal things but when an error hangs for five minutes, you have to take it seriously and run it again
- When you do everything right, it must boot
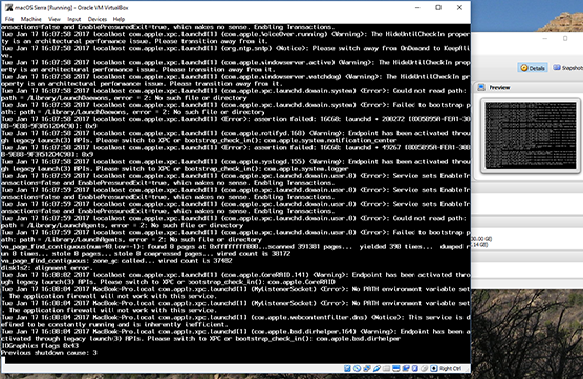
- Instantly, Installer will ask you to choose the appropriate language for you
- You can pick out English or any other language which you can get understand
- After picking out the language you have to press the Next button
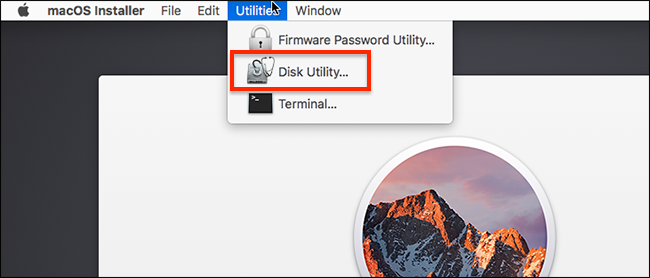
- Click on “Utilities” and then Disk Utility
- Click on the drive labeled “VBOX HARDDISK” and then click on “Erase”
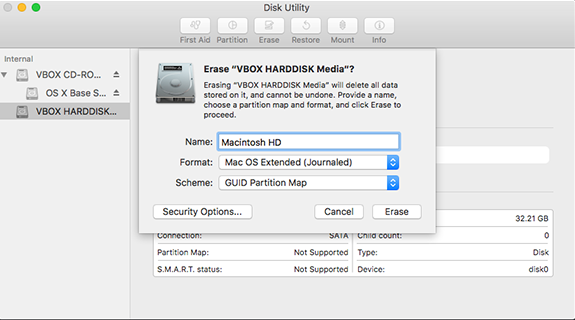
- Name this drive as “Macintosh HD”
- Leave the other two settings as they are (“Mac OS Extended Journaled” and “GUID Partition Map”)
- Click on Erase button and shut the Disk Utility when the process completed
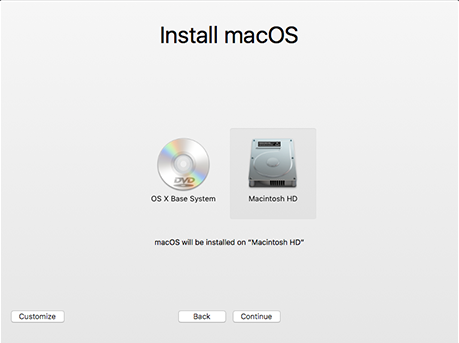
- Again come to the Installer and click on Next button
- Then click on “Macintosh HD” when asked
You can also read a complete tutorial on watch free movies and TV shows with an iOS app Called “Movie Box”
- The process to Install Mac OS Sierra in Virtual Box will start within a second and it can take a while to be installed
- After this re-booting will be starting into macOS
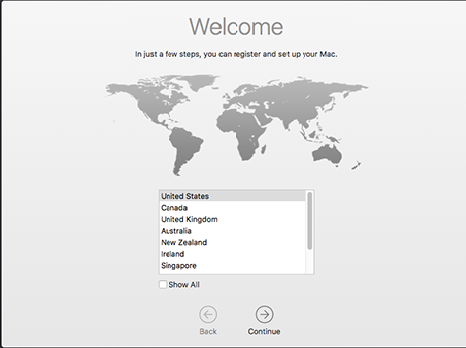
- When Sierra boot it will ask you about your country, time zone, and other basic information
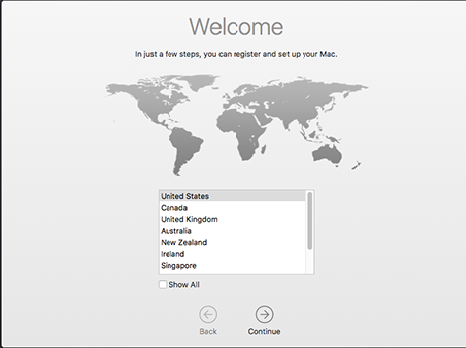
- Within a few seconds you will see a Mac window which means that your system is ready and you can install any Mac software. Still, you should know that Apple doesn’t show your machine a real machine.
Step # 6: Changing Resolution
It is an optional step which can be taken according to the screen of your machine’s monitor.
- The default resolution is 1024 × 768
- When you need to change the resolution, you have to paste some commands
- First of all, shut down your virtual machine by shutting down macOS
- Select Apple, from the menu and click on “Shut Down” close the VirtualBox(with open VirtualBox this step will not work)
- Go to Window Command Prompt where you need to paste the following two commands
cd “C:\Program Files\Oracle\VirtualBox\”
VBoxManage setextradata “macOS Sierra” “VBoxInternal2/EfiGopMode” N
In the second command, you can replace “N” with the number from 1 to 5 of different resolution
- “1” shows the resolution of 800 × 600
- “2” shows the resolution of 1024 × 768
- “3” shows the resolution of 1280 × 1024
- “4” shows the resolution of 1440 × 900
- “5” shows the resolution of 1920 × 1200
- Start VirtualBox and load the Virtual machine. It will boot your customized resolution
From here, you can open VirtualBox for any Mac-related testing which you want to do. You will see errors during the booting time but its fine for your system. Note that the audio doesn’t work for the system with VirtualBox.
The process to Install Mac OS Sierra in Virtual Box in Windows 10 has been ended. Now you can use it.
Final Words
We have discussed “how to install mac os on pc virtual machine on Windows 10 using Virtual Box“. You have also given a link for mac os VirtualBox image to download.
Hopefully, this article will help you a lot to Install Mac OS Sierra in Virtual Box in a Windows-based system. You can share your precious experience with us via comments.
Also, share “install mac os on pc virtual machine” with your friends to help them out.
