How to Create Donation Forms For Non-Profit Organizations
Do you want to create donation forms for websites, schools, charity or Lifesaving from Cancer? Here’s how to create donation forms for non-profit organizations.
It is a very complex question for non-technical users that how they accept the donations via their website by creating donation forms for non-profit organizations.
Here is a complete and easy solution to this complex question that will guide you on how to create donation forms for non-profit organizations.
Many users “add PayPal donate button” simply but it is not a proper solution for everything. For most convenient donation forms, you should create your own custom donation forms for your WordPress site.
Also, try these suggestions from TheFanmanShow
- How to Start a Blog For Free and Make Money Online
- Best AdSense Optimized Themes for WordPress
- WordPress Design and Development Services –A Popular Choice Today
- These are the Top Millionaire Bloggers in India
Why Create Customized donation forms for non-profit organizations?
When you create donation forms for non-profit organizations in WordPress it contains many benefits. Some general benefits are given below;
- Customized Donation Form Fields can gather information which you required
- Donors can get more professional experience from your website
- You can ask the donors if they wish to subscribe to your email newsletter in the same form
- Other payment processors can be easily used on the site except for PayPal such as credit cards
- You can integrate your donation form with third-party software, for example, CRM or Cloud Storages
You can notice that the donors can directly involve to your site for donations and the time can be saved from redirection to PayPal.
You often think that it is very complex to create donation forms for non-profit organizations in WordPress but there are some plugins which can make it easy and simple.
You can check out for more WordPress Plugins for AdSense 2019 on our blog.
Building a Custom donation Form in WordPress:
Many form builders are used in the world of websites but WPForm is best to build donation forms for non-profit organizations among all form builders. By drag and drop facility you can easily build a form even if you don’t have some technical knowledge. If you want to know more about the WPForm you can CLICK HERE.
For the process of payments for your donation form, you shall need PayPal or stripe addons for WPForms. Both add-ons have bearable prices to get. If you want to know the prices of these add-ons CLICK HERE.
Follow the step by step guide to creating a donation form for your WordPress site.
-
Installation & Activation of WPForms:
- Download WPForm from WordPress form builder plugin or log in to your account at WPForms and download the plugin
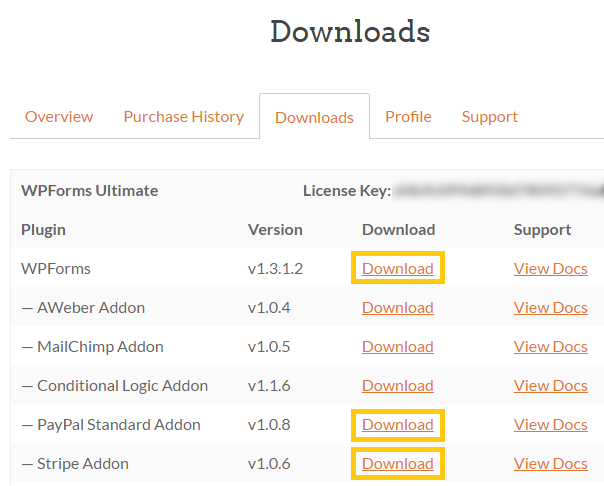
- After downloading, you should install and activate these plugins
2. Creating a Donation Form:
-
- Click on WPForms > Add New to get started
- You can name your donation form on the top of the page. Here, I named my form as Non-Profit Donation Form
- You can see Pre-built form templates list where you can choose one for you
- Select Donation Form template and click on Create a Donation Form to create your donation form
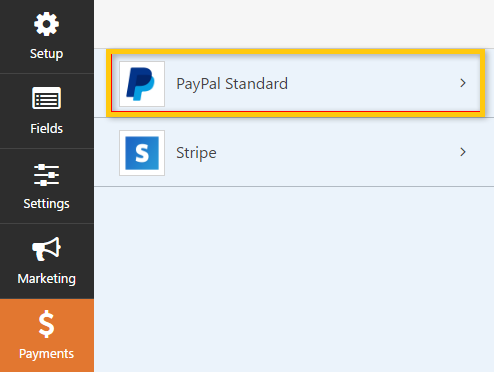
- A pop-up reminder will appear which reminds you to click the payments tab to configure the payment provider. For now, you should click on Ok
The fields of the donation form are given below:
- Name
- Donation Amount
- Comment or Message
Moreover
- The donation field should be a single item where users can put the amount they donate. Dropdown list for multiple fields can be added instead
- Go to Payment fields > Multiple Items to add multiple choice payment field
- Multiple Items field should be above The Donation Amount For this you can drag and reorder the fields
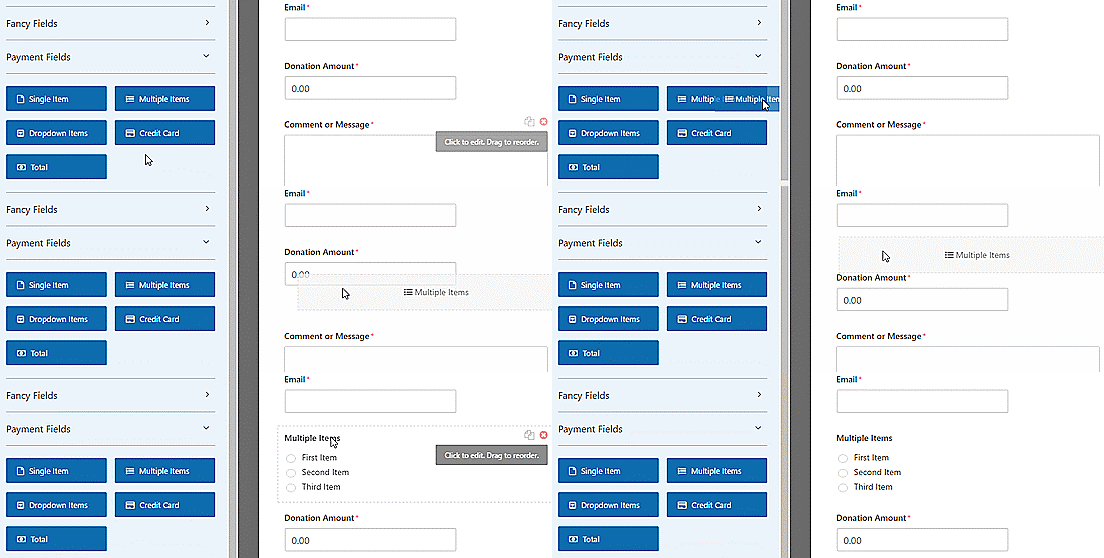
- Click on Multiple Items field to alter the options
- Now, change the label to say Donation Amount and you can enter the amounts for donations with entering Amount option
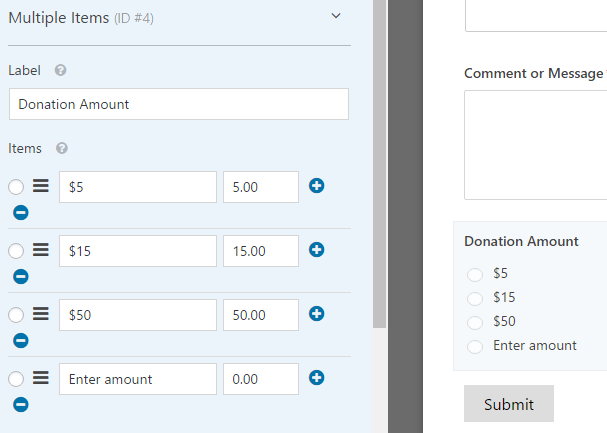
- Here, I am describing to change the single item field to only display with entering Amount option
- Click on the single item field to edit the options
- The required checkbox should not be checked because it will prevent the users from submitting forms if they select a donation amount in the multiple choice field

- Now, scroll down to click on Conditionals to go to the Display Settings for the fields
- Mark the checkbox of Enable conditional logic and then select the option to show this field if Donation Amount is Enter Amount
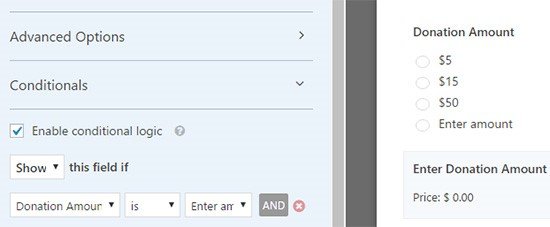
- Must click on Save to save the changes you made

3. Setting Up Payment Integration:
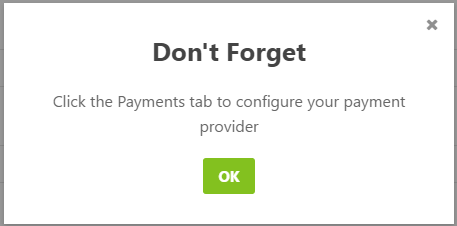
- In the form edit screen page, click on the Payments tab and then click the PayPal Standard option

- Input your settings on the right side of the screen
- Checkmark the Enable PayPal Standard payments checkbox and your PayPal email address
- In the Payment Type drop-down menu, don’t forget to select Donation
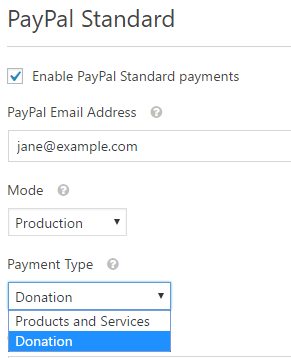
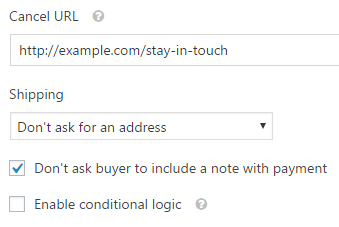
- In the below section, if the visitors cancel the checkout process, you can send them URL. This might be a good activity to re-engage the visitors with your website
- You can ask them to follow your blog on Social Media to remain in touch
- The shipping address options can be customized to ask the donors to add a note during the PayPal checkout
- The Conditional logic is not required for donation form but if you want to add a donation option to another form, you can use the conditional logic
- Don’t forget to click on Save button to save the changes you made
4. Customize Notification:
to display customized notifications in your donation forms for non-profit organizations, do the following steps:
- Now, you have to make sure that donors receive the confirmation email after they donate
- To customize the email notifications, go to Settings > Notifications
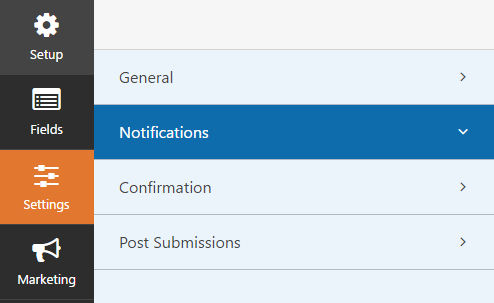
- You’ll notice that the website administrator receive a default notification
- Click on Add New Notification button to make a separate notification for the donors
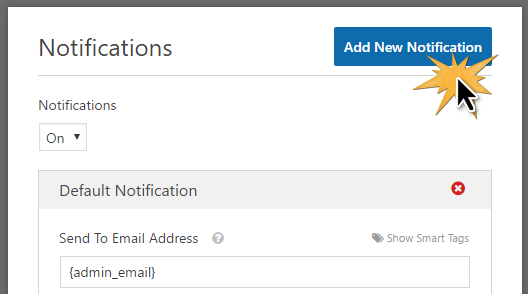
- Add the name of new notification in the pop-up menu and press on OK button

- Make sure that the notifications are sent to the donor’s email address
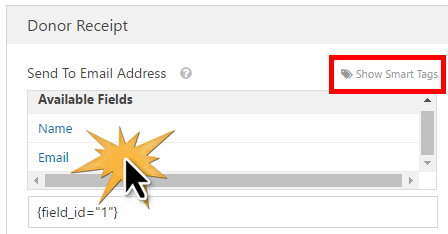
- At this stage, click on Send to Email Address and then click on Show Smart Tags. A smart tag will appear such as {field_id=”1″}
- Be sure to click on Save button to store the changes that you made for notifications
5. Adding Donation Forms For Non-Profit Organizations to Your Site:
At this stage, your donation form is completed. So, you can place this form to your website by following the given steps below:
- If you are using WPForm then it is easy to add this form to your website by a simple shortcode or by a donation widget on the sidebar or on the footer
- Go to Pages > Add New. You have to put a title on your page such as Donate and then click on the Add Form button
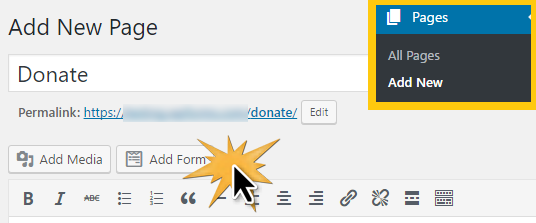
- From the drop-down field, you have to select Add Form button
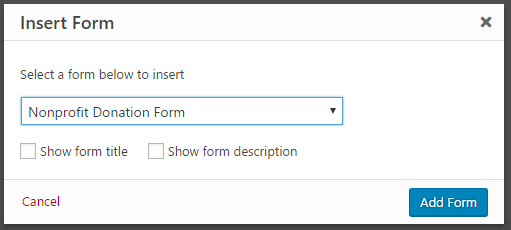
- A shortcode will appear on your page. Here you can add any text or images to this page and at the end when you finished adding text and images, click on Publish button

- You have to add the new donation page to your website’s navigation menus so that visitors can find it with ease
Final Words
I hope this article “how to create donation forms for non-profit organizations with WPForms Ultimate” will help you a lot in building generic donation form in WordPress for your website. You can also create many non-profit donation form templates and later select the best one which attracts users to do not hesitate while donating.
I appreciate your response via comments.
