
How to Create a Bootable Linux USB Flash and Install Linux in PC
It was the ancient times when windows were to be installed via CDs. DVDs. Now a days its quite easy to Create a Bootable Linux USB Flash and Install Linux in PC.
Like Windows, Ubuntu also offers a variety of ISO images related to their versions but you need to run third-party software to make a bootable USB drive.
You’ll also require an ISO file of the version you are going to create a boot in USB. Here in our example, we will use UBUNTU. So go ahead to the download Ubuntu Desktop page and download your desired version.
If you are new to Ubuntu and do not have too much knowledge about Ubuntu then The Fanman Show will recommend you to download LTS release.
So, let’s have a deep look to create a bootable Linux USB flash and install Linux in PC through Windows and Linux-based systems.
How to Create a Bootable USB Drive on Windows
There are numerous tools available on the internet to create bootable USB from iso but here we’ll use a free tool “Rufus” because of reliable and faster file conversion.
So, Download Rufus.
When it is downloaded, double-click on it and click on yes. It will be open immediately.
Connect a USB that must be equal to or greater than 2 GB of free space to your Windows PC.
Important Note*: please copy all of your data from your USB Drive because Rufus will erase all of your data from the USB and will format your USB.
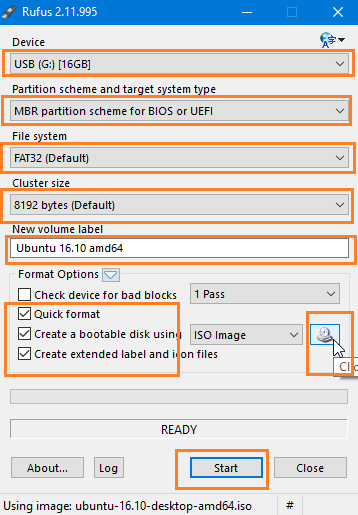
The first option is the Device. The connected USB will show up under the Device menu option. If you have multiple USBs connected to your Windows PC, then make sure to select the proper one or remove unnecessary USBs.
Try these:
- How To Take Screenshot Of a Complete Webpage With One Click
- How To Restart Windows’ Explorer.Exe Using Taskbar And Start Menu
- Everything You Need To Know Windows 11 Release Date, Features, and Improvement
[su_list icon=”icon: hand-o-right” icon_color=”#ff774a”]
- Select MBR Partition Scheme for BIOS or UEFI
- Select the File System “Fat 32”
- Keep the cluster size “Default” 8192
- Give it a New Volume Label of your own choice. Let’s say it is “Ubuntu 16.04.3 LTS”
- Make a check on “Quick Format”, “Create a Bootable Disk Using ISO Image” and “Create Extended Label and Icon Files”.
- Click on the CD icon on the image to select the path of the ISO image stored on your Windows PC (which you have downloaded right now)
- After selecting the correct option, click on the “Start” button to begin the Bootable Flash Drive.
[/su_list]
You may be asked if you need newer SysLinux files. Just click the “Yes” button and Rufus will automatically download them for you.

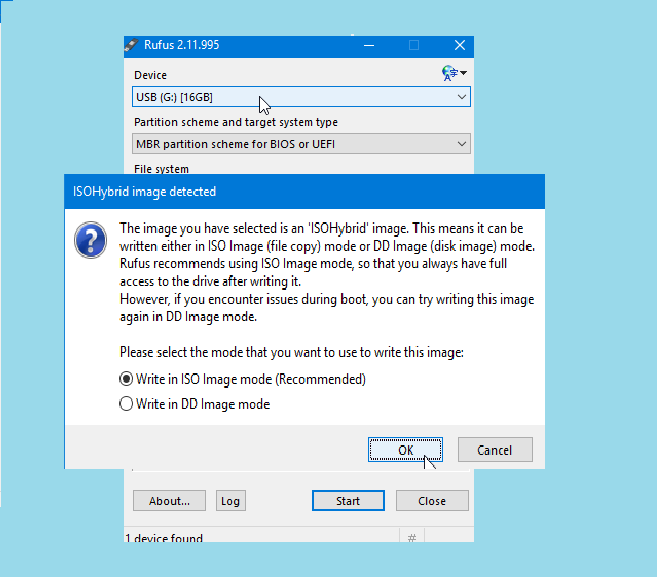
Rufus will require how you want to write the image. So select the default option—“Write in ISO Image Mode (Recommended)”—and click “OK”.
You’ll be warned that all data on the USB drive will be erased. Click “OK” to continue if the drive has no important data on it. But if you forgot to back up your flash drive then cancel the process and copy your important data as I said earlier to you.
 Now Rufus will start making Ubuntu bootable USB on Windows 10. When it’s done, click on the “Close” button to close the Bootable process.
After creating the Ubuntu bootable USB drive, you can now run Ubuntu from USB. To do so restart your computer to take effects.
If it is not working then go to PC BIOS Settings and select Boot From USB from the boot option.
So here’s all about How you can Create a Bootable Linux USB Flash and Install Linux on a PC.
If you find this article helpful then share your ideas with us through your comments.